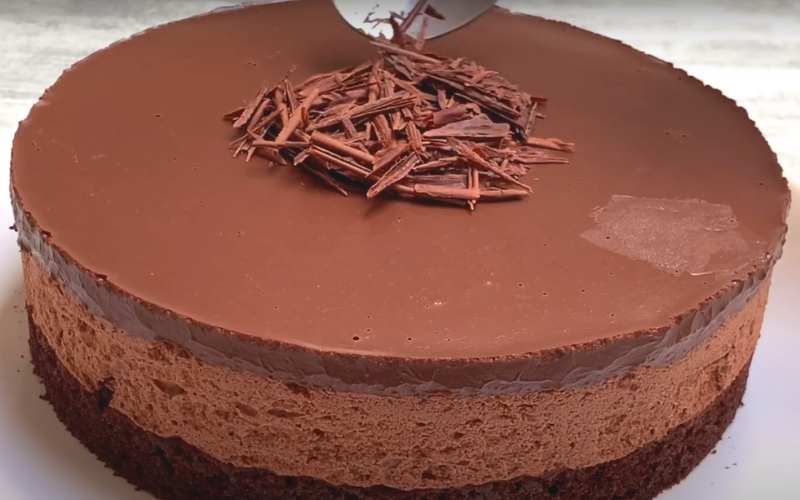
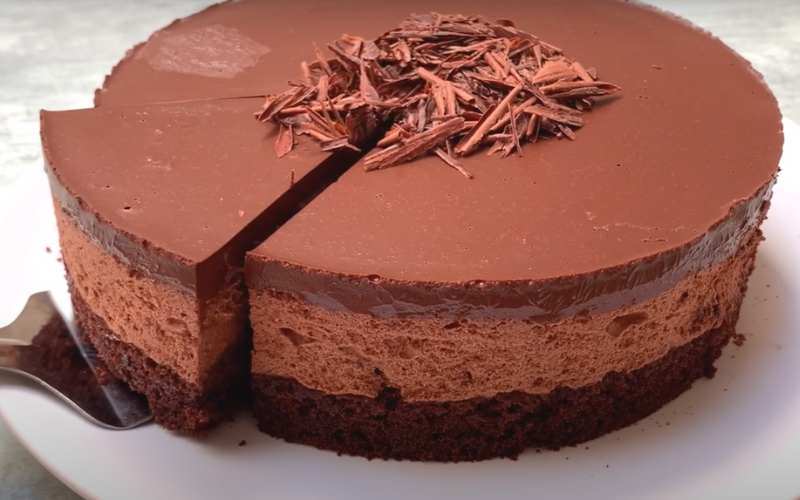
Ever dreamt of creating a heavenly chocolate mousse cake that’s not just a treat for your taste buds but also a breeze to whip up? How you can easily make it?
Mix cake water, vegetable oil, and eggs to prepare the chocolate cake batter. Bake the batter in a greased pan as directed.
While it cools, make a chocolate pudding layer by whisking pudding mix with milk. Cut the cooled cake into layers, and spread pudding on one layer.
Whip cream with sugar and vanilla then spread over the pudding layer. Top with the second cake layer, decorate, refrigerate, and enjoy the rich and creamy homemade chocolate mousse cake!
In this blog, we’ll learn the secrets to an easy chocolate mousse cake in detail.
Ingredients Needed to Make Easy Chocolate Mousse Cake
Before you start making the delicious chocolate mousse cake, gather all the ingredients you’ll need:
| Ingredient | Amount | Also You Can Use | Purpose |
| Chocolate Cake Mix | 1 package | Base of the cake, providing structure, flavor, and texture. | |
| Water | 1 cup | Milk or buttermilk for a richer flavor. Brewed coffee for intensified chocolate flavor. | Helps dissolve and distribute ingredients evenly in the cake mix. |
| Vegetable Oil | ½ cup | Melted butter for a buttery taste. Coconut oil for a different flavor profile. | Adds moisture, making the cake tender. Contributes to richness and texture. |
| Eggs | 3 | Binding agent, holds the cake together. Contributes to structure and moisture. | |
| Instant Chocolate Pudding Mix | 1 package | Adds chocolatey goodness and a creamy texture to the cake. Enhances overall flavor and consistency. | |
| Milk | 2 cups | Used to make the chocolate pudding layer, adding creaminess and a smooth texture. | |
| Heavy Whipping Cream | 2 cups | Maple syrup, honey, or agave nectar as natural sweeteners. Adjust quantity for sweetness. | Essential for the mousse layer, providing a light and fluffy texture. Adds richness to the taste. |
| Powdered Sugar | ¼ cup | Sweetens the whipped cream layer, balancing flavors and contributing to dessert sweetness. | |
| Vanilla Extract | 1 teaspoon | Enhances the flavor of the cake and whipped cream, adding a subtle, aromatic note. | |
| Chocolate Shavings or Sprinkles | Optional | Optional decorative elements, contributing to the overall chocolatey experience. |
How to Make Easy Chocolate Mousse Cake – (Step by Step)

Prepare delicious Chocolate Mousse Cake with this step-by-step guide. Sweet adventures await!
Step 1: Prepare the Cake Batter
In this step, we’ll make the chocolate cake batter. Follow the instructions on the cake mix box.
Typically, you’ll mix the cake mix, water, vegetable oil, and eggs in a large bowl. Use a whisk to blend everything until it’s smooth.
Step 2: Bake the Cake
Pour the cake batter into a greased and floured baking pan.
Preheat your oven according to the cake mix instructions, and then bake the cake as directed. Once it’s done, let it cool completely.
Step 3: Make the Chocolate Pudding Layer
While the cake is cooling, it’s time to make the chocolate pudding layer.
Combine the instant chocolate pudding mix with the milk in a separate bowl. Whisk it until it thickens. Once done, refrigerate the pudding until it’s set.
Step 4: Cut the Cake and Assemble Layers
Once the cake has cooled, carefully cut it horizontally into two layers. Place the bottom layer on a serving plate.
Now, spread the chilled chocolate pudding evenly over the bottom cake layer.
Step 5: Whip the Cream
Whip the heavy whipping cream in a large bowl using an electric mixer.
Gradually add powdered sugar and vanilla extract while continuing to whip. Whip until the cream forms stiff peaks.
Step 6: Add the Whipped Cream Layer
Spread a generous layer of the whipped cream over the chocolate pudding layer. Make it smooth and even.
Step 7: Top Layer and Decoration
Place the second cake layer on top of the whipped cream.
Now, you can decorate your chocolate mousse cake with chocolate shavings or sprinkles for an extra touch of sweetness.
Step 8: Chill and Serve
Refrigerate the chocolate mousse cake for at least a few hours or overnight. This helps all the layers set and enhances the flavors.
Once chilled, slice it up and serve your delicious homemade chocolate mousse cake! Enjoy the rich and creamy goodness!
How Do You Store & Serve Chocolate Mousse Cake

Remember, the better you serve it, everyone can enjoy the tasty goodness you’ve created!
Store it with the below tips to keep your cake fresh and delightful for many days.
Serving Tips
When it’s time to serve your chocolate mousse cake and share the joy, follow these simple steps:
- Take it Out: Remove the cake from the refrigerator and let it sit at room temperature for 10-15 minutes. This gives it a chance to soften for a more enjoyable bite.
- Get Ready to Slice: Use a sharp knife dipped in warm water to make slicing smoother. Wipe the knife between cuts to keep each slice looking neat.
- Plate it Right: Place each lovely slice on a plate. Add extra chocolate shavings, a dollop of whipped cream, or a sprinkle of cocoa powder for an extra special touch.
- Enjoy Every Bite: Now, it’s time to savor your creation! Enjoy every delicious bite of your easy chocolate mousse cake, whether it’s a small celebration or just a sweet treat.
Storing Tips
Once you’ve made your tasty chocolate mousse cake, it’s important to keep it fresh until you’re ready to enjoy more. Here’s how you do it:
- Cover it Up: Cover the remaining cake with plastic wrap after cutting a slice or two. This helps keep the air out and prevents the cake from drying out.
- Refrigerate: Put your covered cake in the refrigerator. The cold fridge keeps the whipped cream and pudding layers firm and tasty. It’s like giving your cake a cozy home until you’re ready for the next bite.
- Keep it Chill: Try to store your chocolate mousse cake in the fridge for no more than a couple of days. The sooner you finish it, the fresher it stays!
How Long Does Chocolate Mousse Cake Last?
A chocolate mousse cake typically lasts 3-5 days when stored in the refrigerator. If you make it for sell, its best practice to sell it within 3 days.
And if you make for home, you can keep it up to 5 days in fridge without any issue.
For optimal freshness and taste, consume it within this timeframe, ensuring a delightful culinary experience.
Common Mistakes, Solutions & Prevention When Easy Chocolate Mousse Cake Making
Find the sweet terrain of chocolate mousse cake perfection by clearing common mistakes. Discover solutions and prevention tips here!
| Mistake | Solutions | Prevention |
| Forgetting to grease the cake pan | Grease the pan with butter or cooking spray before pouring the batter. | Always grease the cake pan to prevent sticking. |
| Overmixing the cake batter | Mix until just combined; overmixing can make the cake dense. | Mix the batter gently, only until everything is mixed evenly. |
| Not letting the cake cool before adding pudding | Cool the cake completely to prevent the pudding from becoming too runny. | Be patient and let the cake cool before moving on to the next layer. |
| Whipping cream too much or too little | Whip until stiff peaks form for a fluffy texture. | Pay attention while whipping; stop when the cream is smooth and holds its shape. |
| Pudding not setting properly | Follow the pudding mix instructions and refrigerate for the recommended time. | Allow enough time for the pudding to set before adding it to the cake. |
| Cutting the cake while it’s warm | Let the cake cool completely before slicing to avoid crumbling. | Resist the urge to cut too soon; patience helps maintain the cake’s structure. |
| Storing in the fridge uncovered | Cover the cake with plastic wrap to prevent it from drying out. | Always cover your cake before storing it in the fridge. |
| Leaving the cake in the fridge for too long | Consume within a couple of days for freshness. | Plan to finish the cake sooner to enjoy it at its best. |
Last Notes
Now that you’ve got the scoop on making an easy chocolate mousse cake, it’s time to dive into the delicious world of homemade desserts!
Give it a shot, enjoy experimenting, and share your tasty adventures.
Remember to spread the joy by sharing your delightful chocolatey creation with friends and family and Definity with us! Share your experience in the comment box with images.
Happy baking, and may your kitchen be filled with the sweet aroma of success!
Leave a Reply