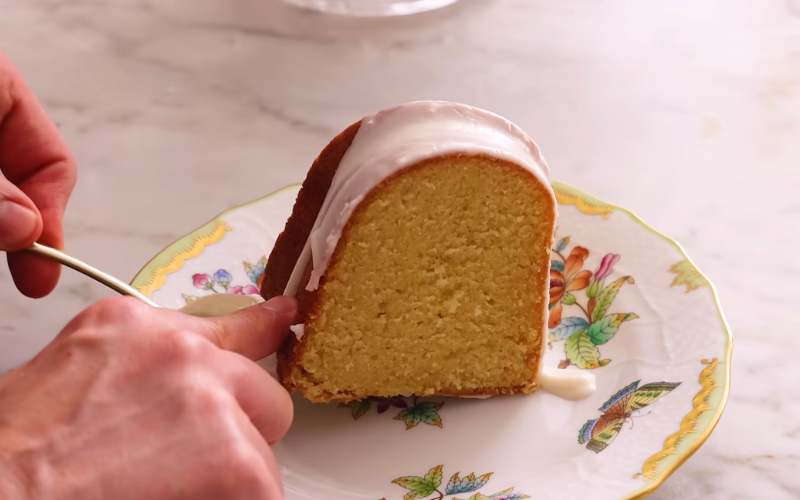
The classic vanilla bundt cake is buttery, light, and moist with a tight crumb. Packed with amazing vanilla flavor, it’s everything you want in a tender bundt cake.
A bundt cake has a hole in the middle to ensure it bakes evenly and doesn’t get too done on the edges.
Making this vanilla bundt cake from scratch is unbelievably easy with the right materials and ingredients. You will require all-purpose flour, baking powder, baking soda, Kosher salt, cream cheese, unsalted butter, sugar, eggs, vanilla, and milk.
It’s my go-to recipe for bringing a tasty treat to a friend’s house stress-free. Quick to make and forgiving, it turns out perfect every time.
I am from MasterChefTravel. Check out my step-by-step tutorial for flawless cake-making! The recipe is so simple that you’ll have no excuse not to make this exceptional cake at home from scratch.
Ingredients Needed for an Easy Classic Vanilla Bundt Cake
- 3 Cups of All-Purpose Flour: Provides the main structure and texture of the cake.
- 1 teaspoon Baking Powder and ½ Baking Soda: Act as leavening agents, helping the cake rise and become fluffy.
- 1 ½ teaspoons Kosher Salt: Enhances the overall flavor of the cake.
- 8 ounces Cream Cheese and 1 cup unsalted Butter: Create a creamy and smooth base, adding richness and flavor.
- 2 cups Sugar: Sweetens the cake, contributing to its texture and moisture.
- 6 Eggs: Add moisture structure and help the cake rise. They contribute to the light and fluffy texture. You can use flax seed eggs if you don’t eat eggs. Replace 1 egg with 1 tablespoon of ground flaxseed and 3 tablespoons of water. For this recipe, you’ll need 2.5 tablespoons of ground flax seeds and 7.5 tablespoons of water. Mix them in the fridge for 10 minutes until it gets gloopy. Then, follow the recipe as usual.
- Splash of Vanilla: Introduces a sweet and aromatic flavor to the cake.
- 1 cup Whole Milk: Provides liquid for moisture and contributes to the overall richness.
How to Make a Classic Vanilla Bundt Cake – Step-by-Step

Have a delicious adventure with my easy guide. Follow simple instructions for a delightful baking experience!
Step 1: Get the Oven Ready
Preheat your oven to 338 degrees Fahrenheit. This is like giving your ingredients a cozy home where they transform into a yummy Bundt cake.
Step 2: Mix the Dry Stuff
In a big bowl and measure three cups of all-purpose flour. Add 1 teaspoon of baking powder, 1/2 teaspoon of baking soda, and 1 1/2 teaspoon of kosher salt.
If you have a scale, use it for accuracy. You can also sift the dry ingredients for a smoother cake texture.
Step 3: Give It a Good Whisk
Whisk the dry ingredients in the bowl to ensure everything is mixed well. Set this mixture aside for now.
Step 4: Prep the Mixer
If you have a stand mixer, attach the paddle. If not, a hand mixer and a big bowl will work fine.
Step 5: Cream the Cheese and Butter
Combine eight ounces of room-temperature cream cheese in the mixer and one cup of unsalted, room-temperature butter.
Mix them until they become smooth. This is the base for the yummy part of the cake.
Step 6: Sweeten It Up
Add two cups of sugar to the creamy mixture. Mix on low and then increase to high until it becomes light and fluffy. This takes about five minutes.
Step 7: Crack the Eggs and Mix
Crack six eggs into a bowl. Add them one at a time into the mixer, letting each mix in before adding the next. This step makes the cake light and fluffy.
Step 8: Mix with Flour
Alternate, adding three tablespoons of flour with the eggs. Mix it on low to keep the batter light and fluffy.
Step 9: Add Flavor and Liquid
Add a splash of vanilla and one cup of whole milk. Alternate mixing in the rest of the dry ingredients with the remaining milk. Finish mixing by hand to avoid overmixing.
Step 10: Get the Pan Ready
With butter and flour, or use baking spray to prepare your Bundt pan. Make sure it’s well-coated to prevent sticking.
Step 11: Pour and Tap
Pour the batter into the Bundt pan, ensuring it’s spread evenly. Tap the bottom of the pan to remove any air bubbles.
Step 12: Let It Bake
Bake in the preheated oven at 350 degrees Fahrenheit for about 45 minutes or until a toothpick comes out clean when inserted into the center.
Pro Tip:
To make a regular recipe work well in a bundt pan, lower the oven temperature by 25 degrees and bake for 10 to 15 minutes.
This helps prevent the cake from sticking and ensures it’s fully cooked in the middle.
Step 13: Make It Shine
While the cake cools, make the glaze by mixing two cups of powdered sugar, three tablespoons of milk, and 1/2 teaspoon of vanilla. It should have a drizzling consistency.
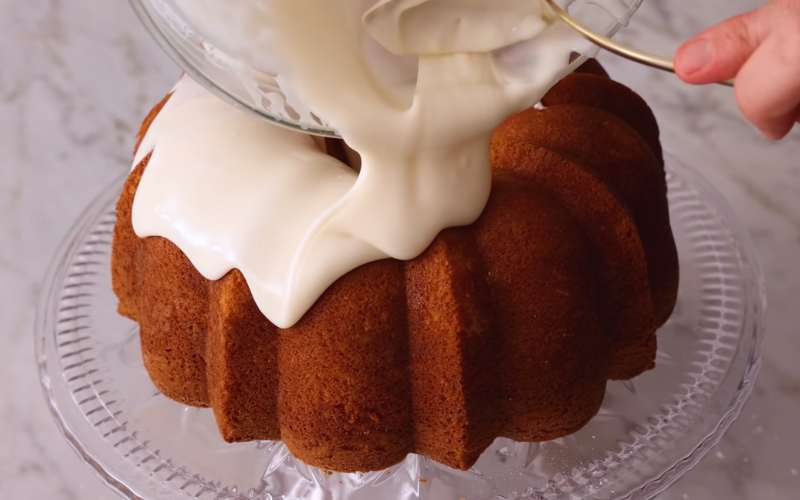
Step 14: Give It a Glaze Bath
Drizzle the glaze over the cooled cake, letting it flow gracefully over the edges.
Time to Enjoy!
Get the golden, soft crumb of your delicious vanilla Bundt cake. Now, savor each bite and share it with friends and family! If you want, try adding your twist to make it uniquely yours.
Pro Tip:
- Allow your vanilla bundt cake to cool in the baking pan for 10 minutes.
- Afterward, move it to a cooling rack or another surface and let it cool completely for 1 to 2 hours.
FAQ’s
What else can I add to my Classic Bundt Cake?
Adding chopped nuts or mini chocolate chips can make your vanilla bundt cake even more exciting.
After making the batter, gently fold in your chosen extras. I recommend using only ½ cup of nuts or mini chocolate chips.
Almonds and pecans go well with vanilla; if you add chocolate chips, the vanilla aroma will enhance the chocolatey taste, especially with dark chocolate!
Can I make a gluten-free Classic Bundt Cake?
Yes! Although I haven’t tried it, you can use a 1-to-1 gluten-free flour with xanthan gum.
This gum replaces the gluten found in regular flour. Without xanthan gum, the recipe may not turn out as expected.
Is adding dairy mandatory in Classic Bundt Cake?
Use vegan butter and plant-based milk. While I haven’t tested it, using dairy-free alternatives should work fine.
However, if you also need an egg-free version, I don’t have recommendations, and the recipe might only work with eggs.
How do you Store and Serve a Classic Vanilla Bundt Cake?

Discover the secrets of preserving and presenting your delightful Classic Vanilla Bundt cake. Unlock the best tips for maintaining freshness and serving perfection!
Serving a Classic Vanilla Bundt Cake
Let your Bundt cake cool down completely. It’s better if you don’t put any glaze on it at this point.
Wrap the cake generously with plastic wrap. Afterward, you can use aluminum foil or put it in freezer bags for extra protection.
If you want to save some cake for later, you can freeze it for up to 3 months. Just remember to defrost it before you want to eat it.
Storing a Classic Vanilla Bundt Cake
Vanilla Bundt Cake tastes the best when it’s at room temperature. You can leave it outside, not in the fridge, for 48 hours.
But after that, it’s better to put it in the refrigerator.
To keep the cake soft and not dry, cover it with plastic wrap before you put it in the fridge. You can store it in the refrigerator for about five days.
Common Mistakes, Solutions, and Prevention During Classic Vanilla Bundt Cake Making
Learn how to bake a flawless Bundt cake with tips on how to avoid common mistakes. Make your baking skills shine!
| Mistakes | Solution | Prevention |
| Not using the right size pan | If you’re unsure of the pan you have at home, fill it with water, counting the cups as you go. A larger pan will have a thinner cake, which bakes faster. A smaller pan will be thicker and won’t bake all the way through. | Choose the right Bundt pan size according to the recipe to avoid overflow or a disappointing cake shape. |
| Not using the right material | Use light, non-stick metal pans if possible. They conduct heat well and the nonstick surface helps to prevent sticking. | Avoid silicone molds and glass pans. |
| Not coating the pan in butter and flour | Tip and shake the pan until the butter is coated in the flour. Discard any excess flour and then pour in the batter. | Ensure a strong rise and easy release by coating the pan with butter and flour. Alternatively, use baking spray with flour for extra insurance. |
| Not properly filling the pan | A good recipe should fill about 2/3 of the pan. Any more and then you might have rounded tops that don’t sit flat on the serving platter or a cake that’s underbaked. | Avoid uneven baking, rounded tops, and undercooked or overcooked cakes. |
| Not giving the cake sufficient time to cool | As the cake cools, it will slowly start to release itself from the sides of the pan. Resist the urge to pull it out immediately and give it time to rest — a good 10 minutes usually does the trick. By flipping it over, the cake will slowly start to pull away from the pan and down onto the platter. | Patience ensures a perfect release and presentation. |
Why is it called a Bundt Cake? History of the Bundt Cake
Bundt cakes, inspired by Eastern European traditions, found their signature aluminum pan in a modern creation by H. David Dalquist.
Dalquist, Minnesota’s Nordic Ware owner, crafted the Hadassah Society pan, aiming to recreate the dense, ring-shaped kugelhopf cake.
Bundt cakes got their name from Dave, who made this pan resembling a traditional Kugelhopf pan. Dalquist invented the Bundt cake pan in the early 1950s.
He called it a “Bundt” pan because “bund” is the German word for gathering.
Originally called a “bund” pan, the T’s addition remains a mystery, with speculations ranging from distancing ties with a pro-Nazi group to trademarking.
The Bundt’s popularity soared in 1966 when a Tunnel of Fudge Cake secured second place in a bake-off. Today, over 70 million households own a Bundt pan, marking Dalquist’s enduring legacy.
Wrap Up
Give this easy Classic Vanilla Bundt Cake a shot in your kitchen! It’s a delightful treat with a melt-in-your-mouth texture. Don’t hesitate to customize it by adding your favorite nuts or chocolate chips.
If you’re feel confident after reading my blog, try making it gluten-free or dairy-free with the provided tips.
Share the joy by baking and sharing this cake with friends and family. Your kitchen will be filled with the sweet aroma of vanilla, and the golden, soft crumb will surely bring smiles.
Have fun baking, and let me know in the comment section how your Bundt cake turns out!
Leave a Reply