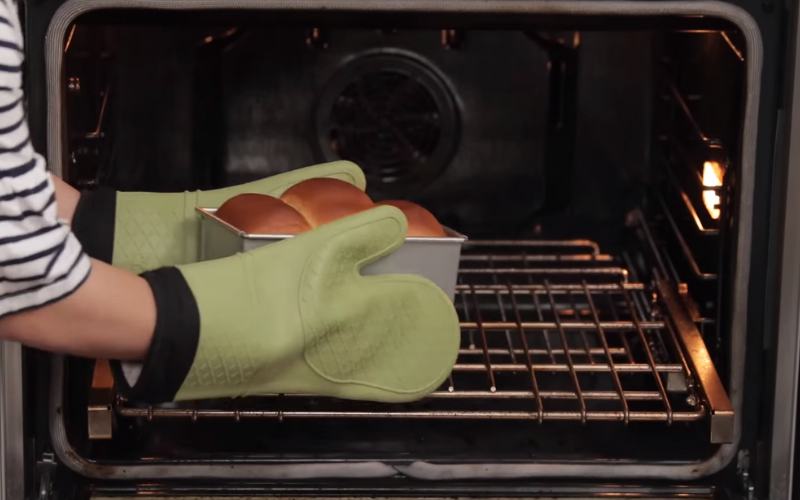
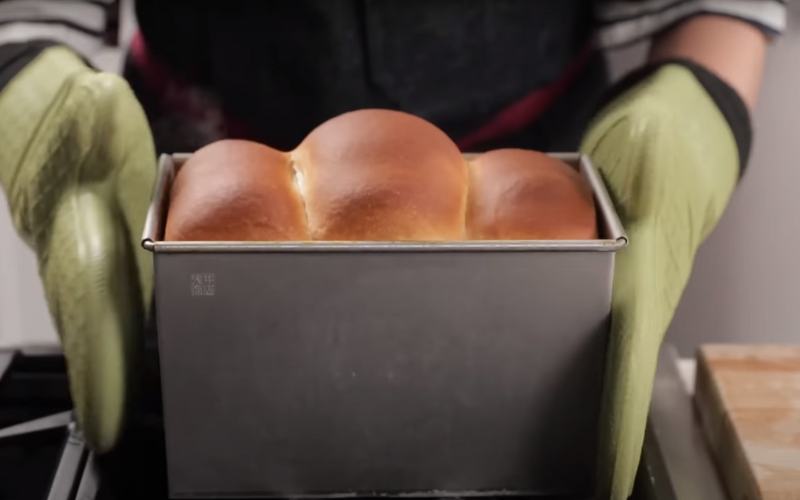
Japanese Milk Bread – a pillowy delight with a secret ingredient and it’s a game-changer for your taste buds.
So, how you can make Japanese Milk Bread perfectly? To make Japanese Milk Bread, start by gathering ingredients. Mix flour, sugar, and salt in a bowl. Warm milk and add melted butter.
Activate yeast in milk until foamy. Combine with dry ingredients, knead for 10 mins, let it rise for 1-2 hours. Punch down, shape into loaves, and bake at 350°F for 20-25 mins. Enjoy the fluffy magic!
Lets know the full recipe guide.
Ingredients Needed to Make Japanese Milk Bread
Explore the essentials for crafting pillowy Japanese Milk Bread. Simple ingredients, big flavor – let’s get baking!
| Ingredient | Amount | Alternatives | Purpose |
| Flour | 2 cups | Main building block, provides sturdiness and texture | |
| Sugar | 2 tablespoons | Adds sweetness, aids yeast for tasty bread | |
| Salt | 1 teaspoon | Balances flavor, enhances overall taste | |
| Milk | 1 cup | Water | Makes bread soft and moist, contributes to texture |
| Butter | 2 tablespoons | Vegetable oil | Adds richness and flavor, enhances taste |
| Yeast | 2 teaspoons | Magic ingredient, makes the dough rise and fluffy |
How to Make Japanese Milk Bread – Step by Step Guide

Let’s learn the easy steps to make Japanese milk bread –
Step 1: Gather Your Ingredients
Gather all the necessary ingredients before making Japanese Milk Bread. Make sure everything is ready on the kitchen counter.
Step 2: Mix the Dough
Mix 2 cups of flour, 2 tablespoons of sugar, and 1 teaspoon of salt in a big bowl. In a separate small bowl, warm 1 cup of milk until it’s warm.
Add 2 tablespoons of melted butter to the milk.
Step 3: Activate the Yeast
Sprinkle 2 teaspoons of yeast over the warm milk mixture. Let it sit for about 5 minutes until it gets a bit foamy.
This means the yeast wakes up and prepares to make our bread rise.
Step 4: Combine Everything
Now, pour the milk and yeast mixture into the big bowl with the flour, sugar, and salt.
Mix it all together until it forms a dough. If it’s too sticky, add a bit more flour. If it’s too dry, add a little more milk.
Step 5: Knead the Dough
On a floured surface, knead the dough for about 10 minutes. This means you fold it, press it, turn it, and repeat.
It’s like giving the dough a little workout to make it soft and elastic.
Step 6: Let it Rise
Place your dough in a bowl, cover it with a clean kitchen towel, and let it sit in a warm spot for about 1-2 hours.
This is where the magic happens – the dough rises and becomes fluffy!
Step 7: Shape the Bread
After the dough has risen, punch it down (yes, gently punch it!) to release the air.
Divide the dough into equal parts and shape them into loaves or buns. Place them on a baking sheet lined with parchment paper.
Step 8: Bake and Enjoy!
Preheat your oven to 350°F (180°C). Once it’s ready, bake your shaped dough for about 20-25 minutes until it turns golden brown.
Your house will smell amazing!
Let them cool a bit before slicing, and there you have it – delicious homemade Japanese Milk Bread or Shokupan! Great job!
Can I Make The Dough In Advance?
Yes, you can prepare the Japanese Milk Bread dough in advance. After the initial rise, refrigerate the dough overnight.
This allows for a slow fermentation process, enhancing flavor. When ready to bake, shape and let it come to room temperature before baking.
Common Mistakes, Solutions & Preventions When Japanese Milk Bread (Shokupan) Making
Learn common mistakes and quick fixes during making Japanese milk bread.
| Mistakes | Solutions | Prevention |
| Dough too sticky or dry | Adjust with more flour or milk as needed. | Measure ingredients accurately. |
| Bread doesn’t rise enough | Check yeast freshness; let dough rise longer in a warm place. | Ensure yeast is not expired; let dough rise sufficiently. |
| Bread too dense or heavy | Knead dough more; don’t overmix ingredients. | Follow kneading and mixing times; use fresh yeast. |
| Unevenly shaped loaves | Divide dough evenly; shape loaves carefully. | Weigh dough for equal portions; practice shaping. |
| Overbaked or underbaked | Adjust baking time; check oven temperature. | Use an oven thermometer; follow recipe instructions. |
| Crust too dark or too pale | Cover with foil if too dark; bake longer if too pale. | Monitor baking time; adjust oven temperature if needed. |
| Bad taste or odor in the bread | Check ingredient freshness; avoid expired items. | Use fresh ingredients; store properly. |
| Bread collapses after rising | Avoid over-proofing; handle dough gently. | Follow recommended rising times; handle dough carefully. |
How to Serve and Store Japanese Milk Bread or Shokupan

Here are the tips for serving and storing Japanese milk bread.
Serving Japanese Milk Bread (Shokupan)
When it’s time to enjoy your bread:
- Slice it Up: Use a sharp knife to slice the bread into your preferred thickness. You can make sandwiches or toast it.
- Toasting: If you like a warm and crispy texture, lightly toast the slices. It adds a bit of crunch!
- Spread or Dip: Add your favorite spreads like butter, jam, or Nutella. Or dip it in soup or hot chocolate for a cozy treat.
- Sandwiches: Make delicious sandwiches with your favorite fillings. The soft texture of Shokupan works well with both sweet and savory options.
Storing Japanese Milk Bread (Shokupan)
After baking your yummy Shokupan, here’s how you can keep it fresh:
- Cool Down First: Let the bread cool completely on a wire rack. This helps it stay fluffy inside.
- Wrap it Up: Use plastic wrap or put it in a sealed bag to keep air out. This stops the bread from drying out.
- Room Temperature: If you plan to finish it within a few days, keeping it at room temperature is satisfactory. Just make sure it’s sealed well.
- Freezing: To keep it longer, you can freeze slices. Wrap each slice individually in plastic and store them in a freezer bag. Thaw when needed.
Final Words
Now that you’ve got the lowdown on making Japanese Milk Bread, it’s time to roll up those sleeves and embark on a delicious baking adventure.
Don’t hesitate away from experimenting or adding your personal touch.
Share your baking experience with us. The kitchen is your playground, so let the aroma of freshly baked Shokupan fill your home.
Happy baking!
Leave a Reply